
Filtering the grid
Narrowing a whole-school week down to the part you care about — the six facets, matching any or all, and the free-room finder.
A whole school's week is too much to look at. Filter is how you get down to the part you are working on, and it is the control that owns everything which removes lessons from view.
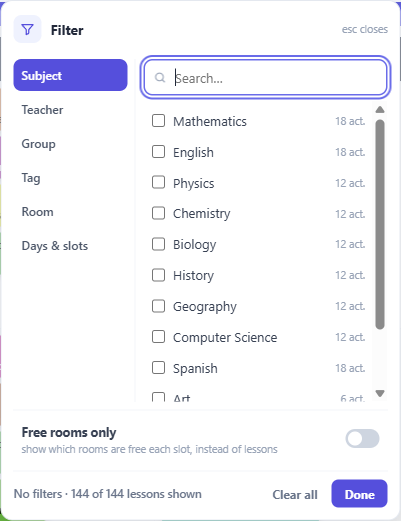
The six facets
Subject, Teacher, Group, Tag, Room, and Days & slots.
They sit in a rail down the side of the panel, each showing how many values you have selected, so the ones you are not currently looking at still tell you their state. That matters more than it sounds — most "why can't I see anything" moments are a forgotten selection in a facet you closed twenty minutes ago.
Inside a facet, each option carries a count of the lessons it would show, so you can see the size of a choice before you make it.
Any or all
The Match switch decides how selections across different facets combine.
Any widens: show me anything matching one or more of my selections. All narrows: show me only what matches every one of them.
Picking a teacher and a subject under all gives you that teacher's lessons in that subject. Under any it gives you everything either of them touches. Both are useful; getting them the wrong way round is the usual cause of a result that looks wrong.
Days and slots
Hiding a day or a period is a filter too, which is why it lives here rather than in a display panel. A school that does not teach Wednesday afternoon can simply hide those slots and get their screen space back.
Be aware that hidden slots stay hidden while you work, so a lesson placed there is out of sight rather than gone.
The chip rail
Every active filter appears as a chip in a rail beneath the controls, and each chip removes itself when clicked. The rail is hidden entirely when nothing is filtered.
This is the antidote to the commonest confusion in any filtered view — is this everything, or is something hidden? If the rail is empty, you are looking at the whole timetable.
Filters are remembered between visits, so the view you left is the view you come back to. Clear all in the panel footer resets them in one action.
Free rooms only
The last switch in the panel changes what the grid draws: instead of the lessons in each slot, it shows the rooms that are free in each slot.
It answers a question the ordinary view cannot. Where can this class go on Tuesday? is not visible in a picture of what is already happening.
Two views are offered. Chips lists each free room, coloured by building, with its capacity. Heat shades each slot by how many rooms are free — greener means more — and gives you the detail on click. Heat is the one to start with when you are looking for slack anywhere in the week; chips is for when you already know the slot.
Two controls sharpen it:
Free for N keeps only rooms open for that many periods in a row, and reports each result as a block with its length. This is how you place a double or triple lesson without checking consecutive slots by hand.
Seats filters by capacity, so you only see rooms that will actually hold the class. Capacity comes from each room's record, so it is only as good as what you entered there.
A companion move worth knowing: a lesson's card offers Show these students' week, which tells you when the students are free. Free-rooms tells you where a room is free. Between them you have both halves of "when and where can this lesson go".